
Today, we’re going to be walking you through the steps, from start to finish, of how we put your chosen photo onto a precious piece of personalised jewellery. We offer many different products so the process of designing each photo pendant is different, but here are the main techniques we use…
Step 1: Recieving your order for your one of a kind Photo Pendant
When we first recieve your order, we are shown the preview you might have made in our preview tool as well as your inscription for the back of the pendant if you chose to have one. Once we’ve decided if your photo is useable (check out our photo tips page HERE) we move on to producing the artwork for your pendant; whether it be a personalised gift or memento of a loved one.
Step 2: Creating the artwork for engraved jewellery
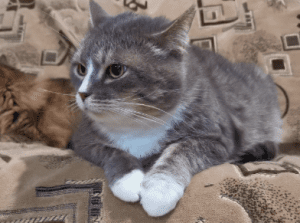
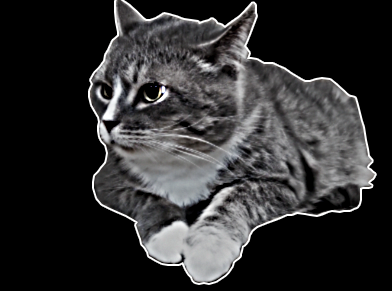
Upon deciding that your photo is suitable, we import it into Photoshop and begin optimizing it so it will turn out as well as possible on your piece of personalised jewellery. We start out by removing the background and replacing it with black, we then adjust the colours and values within the image, before adding a secret blend of filters to give your jewellery pendant an irredescent quality.
Your photo goes from this to this:
Find out more about our pet keepsake product range and get your own personalised jewellery pendant featuring your pet HERE
Step 2.5: Creating the artwork for colour pendants
When it comes to producing a colour pendant, the process of creating artwork is a little bit different. Instead of turning it black and white, we actually enhance the colour as much as possible. We get values like vibrancy and saturation and turn them up to make the photos more bright and colourful. This is so that more colour will transfer onto the pendant.
Step 3: Engraving your personalised jewellery
Once we have your artwork completed, it is now time to engrave your image onto your pendant. First, we start off by importing your artwork into our software. We then set up the software to be able to engrave the right pendant shape and size to match your order. Once we have the program set up, we put your soon-to-be Photo Pendant in our machine and let it do it’s job.
Step 3.5: Sublimation Printing your one of a kind colour pendant
Like the artwork, our process for producing the colour pendants is different. Instead of putting our colour pendants in the engraving machine, we put them in the sublimation printer. Once we’ve created the artwork for your order, we print it out and place it on top of the pendant in the sublimation printer. This then heats the ink up and causes it to evaporate onto the pendant. We then coat the pendant to protect your print from damage.
Step 4: Shipment
We will aim to have your unique personalised jewellery produced in 2 – 3 business days. Your order will be sent to you 1st Class Royal Mail Recorded Signed For. You should expect a waiting time of around 7 days from order to delivery if you’re from the UK and 14 days if you’re from outside of the UK. Read more about our delivery and dispatch details HERE.